How to create a Ubuntu Bootable USB using Ventoy (Linux Guide)
This guide is for Linux-based systems only, not Windows.
I decided to install Ubuntu to explore various developer tools and workflows.
I thought of installing it, but found I needed to install a tool named Ventoy to do so.
We will be creating a Ubuntu Bootable USB using Ventoy
It was a new concept for me to just install it on the pendrive and paste the iso as before when I was using Rufus. It basically does some background processes, and we just need to select the iso.
But in the case of Ventoy, we need to run some commands, and we can get a few errors like space not available, even if there is, it is basically the junk files that are taking up the space. I have mentioned the complete steps below, from installation links to troubleshooting errors I faced.
This is also useful for someone who is trying to make space-related changes. First, we need to make a bootable pendrive and run the commands below, booting into live Ubuntu.
Critical BIOS setting before booting through USB
Also, I faced a critical issue where the USB was not booting. Later, I found out it’s due to secure boot through the vendor, which prevents Ventoy Bootable USB from initializing.
In my case, I had to enter the BIOS using the F2 key, then in the Security Tab Set Supervisor Password, and then in the Boot Tab, I was able to set Secure Boot to disabled.
Initially, Secure Boot is enabled by ACER. We need to manually set it to disabled.
Also in the BIOS menu, the system starts to get hotter faster.
Why I feel Ventoy is better than Rufus :
Traditional bootable USB tools force you to wait nearly 20 minutes to flash a single image. With Ventoy, you can skip the wait and host multiple boot options on one drive just by copying the ISO files directly—no flashing required
Prerequisites for making Ventoy USB on Ubuntu OS
Note first time the Pendrive will be formatted, and it’s normal for all tools like Ventoy and Rufus, so just make a backup of your important data.
Also, Ventoy installation will make two partitions of the USB: one VTOYEFI and another Ventoy(this will contain the ISO files)
Below is a screenshot after creating the Bootable USB using Ventoy

First, we need a pendrive as well as an Ubuntu iso image and Ventoy Software.
Step 1: Download Ventoy and Ubuntu ISO
Links for downloading Ubuntu and Ventoy from their Official website
Ubuntu
Official Ubuntu download page link: https://ubuntu.com/download/desktop
From the list of available ISO images, I downloaded Ubuntu Desktop ISO 24.04.3, which is almost 6 GB in size.
Ventoy for Linux
Official Ventoy Download Link: https://www.ventoy.net/en/download.html
We need to download: ventoy-1.1.10-linux.tar.gz
We are redirected to https://sourceforge.net/projects/ventoy/files/v1.1.10/
Make sure to download ventoy-1.1.10-linux.tar.gz
(After redirect download tar.gz 20 mb one)
We are proceeding with creating a bootable pendrive in Linux
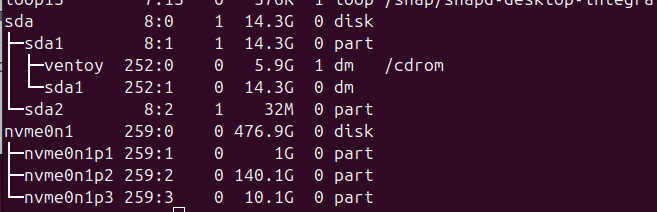
First, check the device name using the command below. Our device is a 16GB pendrive, so we can distinguish using its size
lsblkIn our case its dev/sda
We will use this partition(dev/sda) below while installing Ventoy
Step 2: Install Ventoy on USB
Commands need to run to install Ventoy in a USB
Location where I had kept Ventoy files: /Documents/ventoy-1.1.10-linux/ventoy-1.1.10
Generic command: sudo sh Ventoy2Disk.sh -i <Partition of USB>
sudo sh Ventoy2Disk.sh -i /dev/sdaSTEP 3: Copy Ubuntu ISO
Then just paste the Ubuntu iso.
Facing issue while copying ISO into usb follow: #troubleshoot-copy-into-usb
Now just sync and eject
sudo sync

sudo eject /dev/sda
Troubleshooting unable to unmount/eject USB
We encountered an error while trying to unmount, so we tried using the sudo command
sudo umount /dev/sda1Check who is using the device using the command below:
sudo lsof /dev/sda1From the list of processes Kill a process using the process id for our pendrive
pid can be different, please confirm it in your case first
sudo kill 9568Troubleshoot Problem
Troubleshoot why the Pendrive is showing full even if there is space in the USB drive.
sudo du -h /media/kailash/Ventoy
We can see that trash is consuming our space, and we can remove it
Steps to remove junk files
Do ls -la to confirm there is Trash files
And then remove using :
rm -r ./Trash-1000/Check that trash files are removed
Run the command below, opening the terminal inside the device path
du -h
Now we can easily copy the iso files and boot from the Pendrive
Ubuntu iso started being copied now. We can see in the screenshot below.
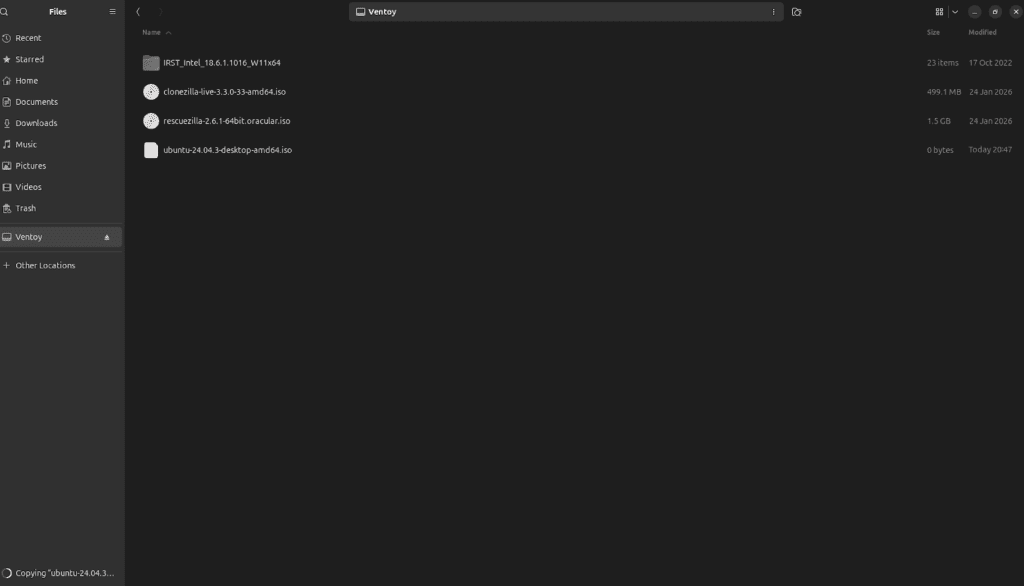
Enjoy booting into your new OS now.
Thanks for reading!!
In my case :
For Acer Boot menu opens in F12 key.
We need to shut down and then again start, and keep pressingthe F12 key until we see the boot menu.
You can check with your vendor’s website for the exact keys.
Resizing Partition after creating a live USB using Ventoy
We cannot resize the partition while the OS is running because the partition is ‘mounted’ and locked. To fix this, we boot into the Ubuntu Live USB we just created. Choose ‘Try Ubuntu’—this runs the OS from the USB and RAM, leaving your hard drive partitions unmounted and ready for resizing via GParted
Using Gparted, we will be resizing the partition, making sure it’s installed.
sudo apt install gpartedResize after booting using the UBUNTU live USB created with Ventoy.
Command: sudo gparted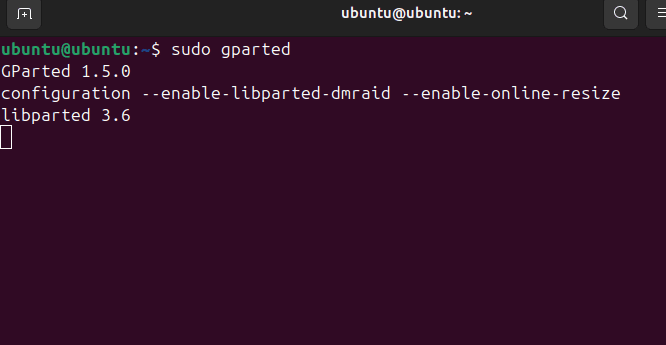
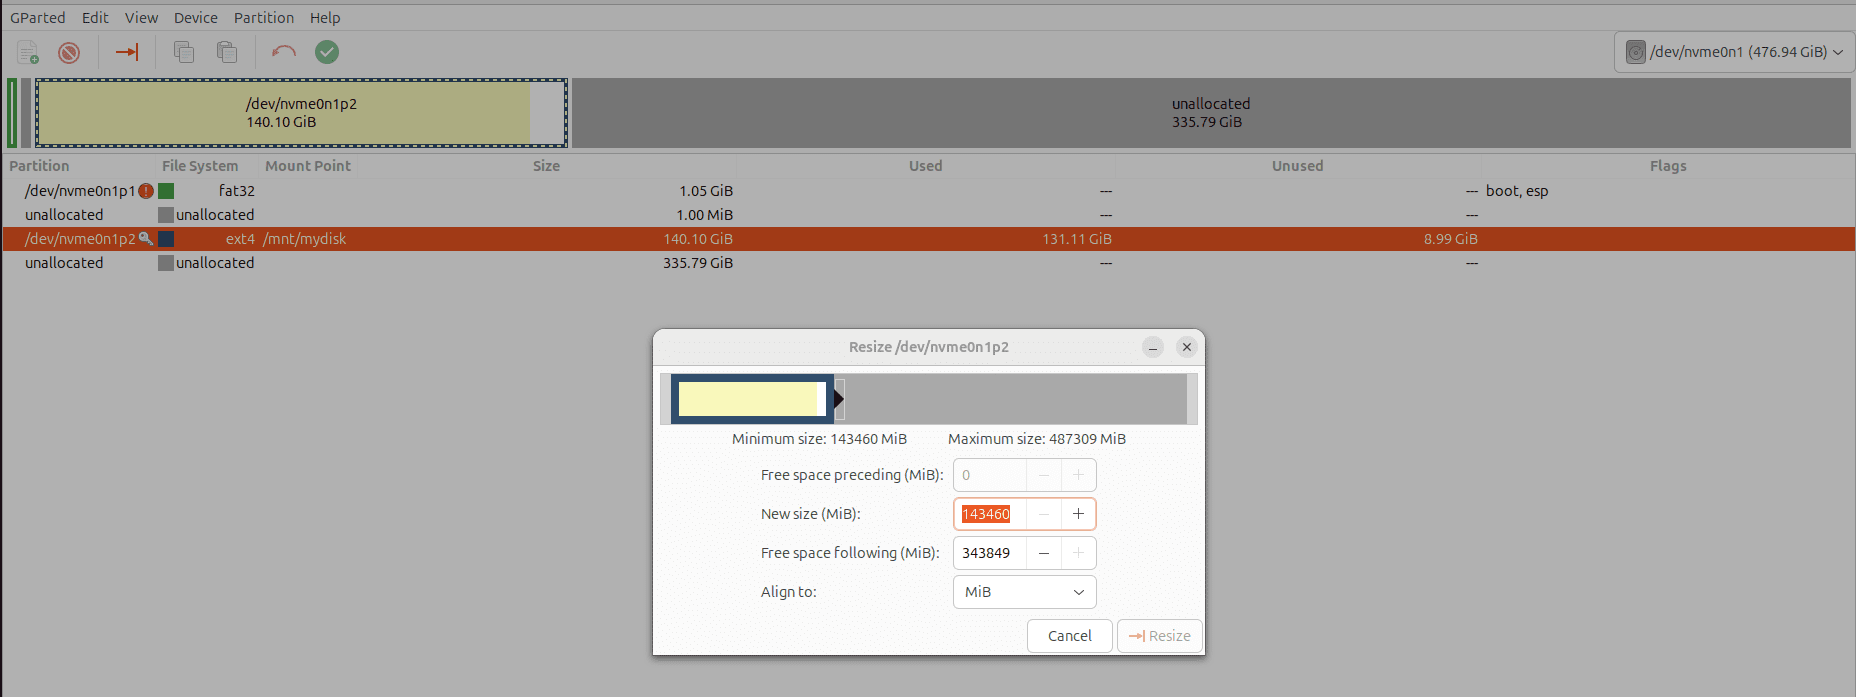
This will open Gparted which will help us resize our partition
First lets see how much the current size is
using the below command:
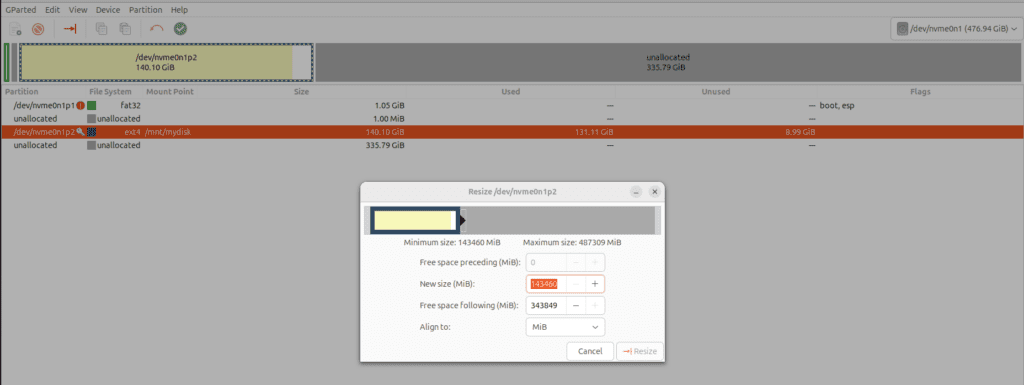
lsblkCurrently it’s 140 GB (dev/nvme0n1/nvme0n1p2)
Select the allocated space, select Resize, then the screen below will open, drag and allocate as required. I will select the complete unallocated space, then click on Reaize button.
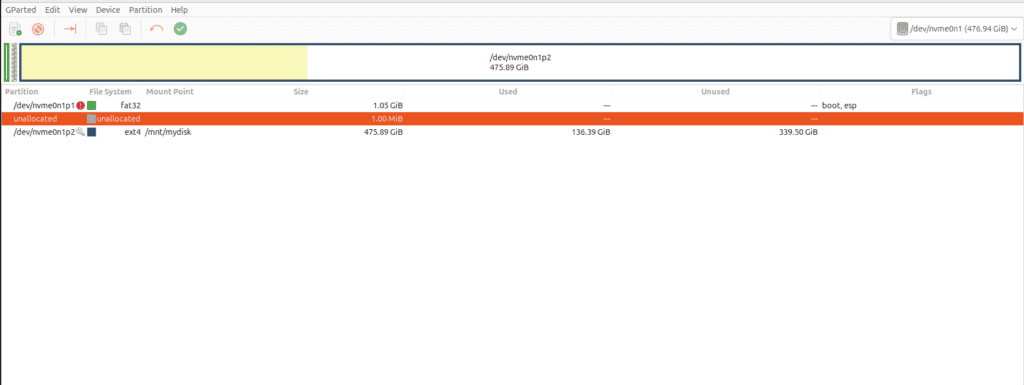
Then we have below, where we now need to click on the green tick option to apply operations to begin the process of merging.
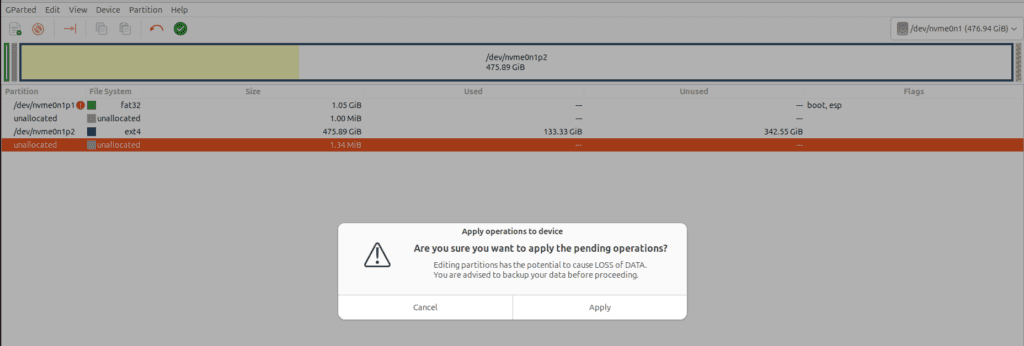
We will be asked to confirm the pending operation select Apply.
After shutting down, you will be asked to remove the bootable USB remove it.
The system will shut down successfully.
Verify Final Partition Size
Now we can reboot and confirm the final space
using command: df -hVoila! We have our 468 GB partition ready.

Muti Boot Option
Drop another ISO of Windows ISO, and now in just 2 minutes, we can boot into Windows as well using this USB.
This was lacking in Rufus. This makes Ventoy different from other tools like Rufus.