How to Point a Hostinger Domain to a VPS (Step-by-Step)
After purchasing a VPS from Hostinger with configuration: 2 cores, 8 GB RAM, 100 GB storage, I then started connecting my Public VPS IP address to my domain.
I recently purchased a new VPS plan and wanted to share the struggles that I have faced while setting up this connection between Hostinger VPS and the Hostinger domain. Initially, I thought they would provide a free domain, so a good deal for around 100 dollars for a year, but later, when I completed my purchase found that they are providing a free domain with .cloud and .tech only. This was a bit frustrating for me as it was not mentioned clearly anywhere. I will add further reviews on its VPS performance later.
For now, let’s focus on connecting our VPS to the Domain
Initially, I thought it would be a 2 min tas,k but later got confused with too many default records by Hostinger. But once I found the records that needed to be removed,d it became easy.
Below is the complete guide to reducing the pain point.
Prerequisite: Before we start, make sure you have your VPS IP address copied and ready to go.
Below are the Steps we need to follow :
Look for the DNS / Name Servers section. This is where you will add your VPS IP address (usually by creating an “A Record”) to point the domain to your server.
1. Log in to your Hostinger dashboard.
Navigate to the Domains tab at the top of the screen.
Click on Domain Portfolio to see your list of domains.
Find the specific domain you want to connect to and click the Manage button next to it.
2. Access Domain Management
A new Page will open ie Domain Overview, look for the section below that says DNS/Nameserver on the right side.
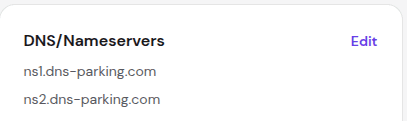
Click on Edit
3. Finding the ‘Manage DNS Records’ Section
In the Domain management section, below the Nameservers section we have the Manage DNS records section, where we need to add Type A records here

Enter our VPS public IP address in the A record to point the domain to our server.
In Place of Point, to the input box, add our VPS IP address. And click on Add Record.
We need to add two A records, @ and www.
4. Records to Add in the Manage DNS Records
Type A Records that should look like
Both records should be visible if added successfully
Type: A | Name: @ | Points to: [Your VPS IP] | TTL: 300
Type: A | Name: www | Points to: [Your VPS IP] | TTL: 300
On adding the www one a pop-up will ask to add this additional A record pointing to the same ip confirm it
Enjoy!! Now Hostinger VPS and the domain are connected successfully.
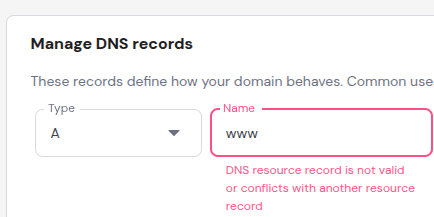
Error: DNS resource record is not valid or conflicts with another resource record
This error appears when a CNAME record for www already exists and conflicts with the new A record
Solution:
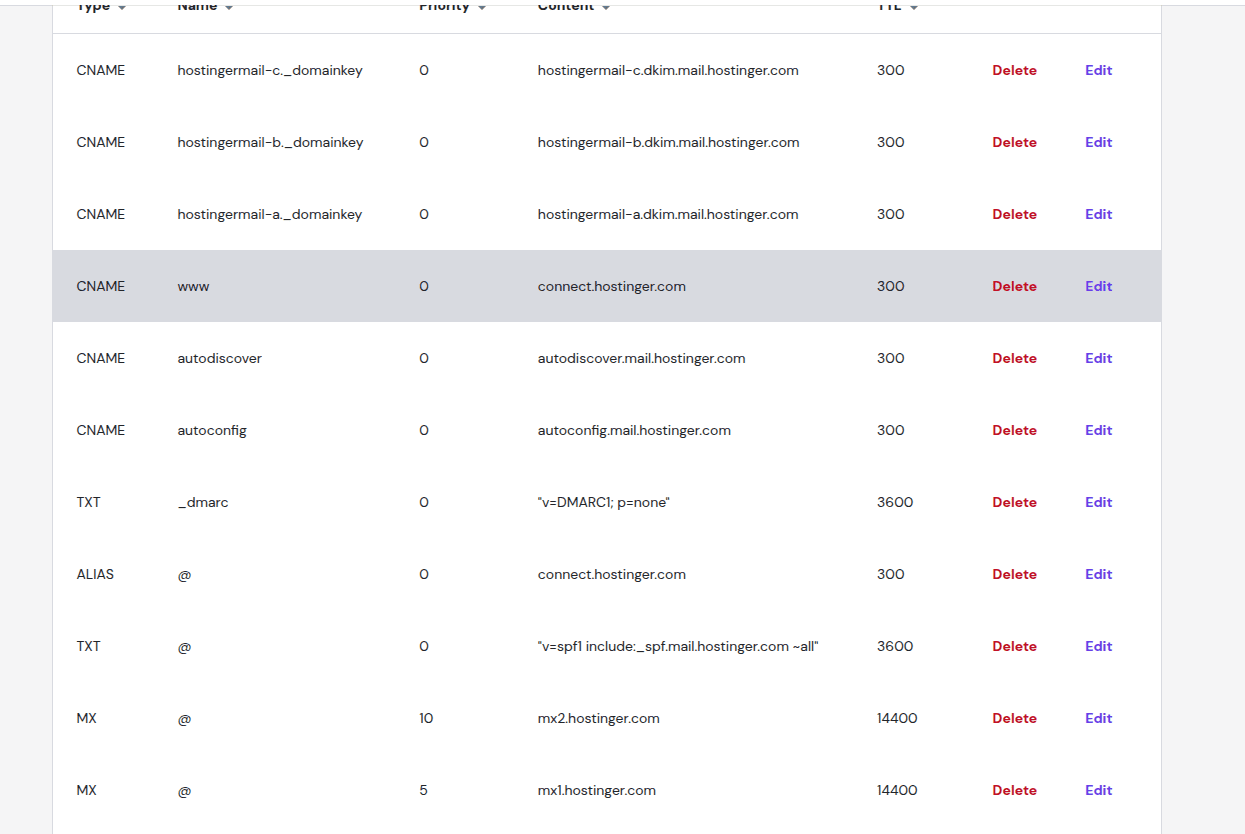
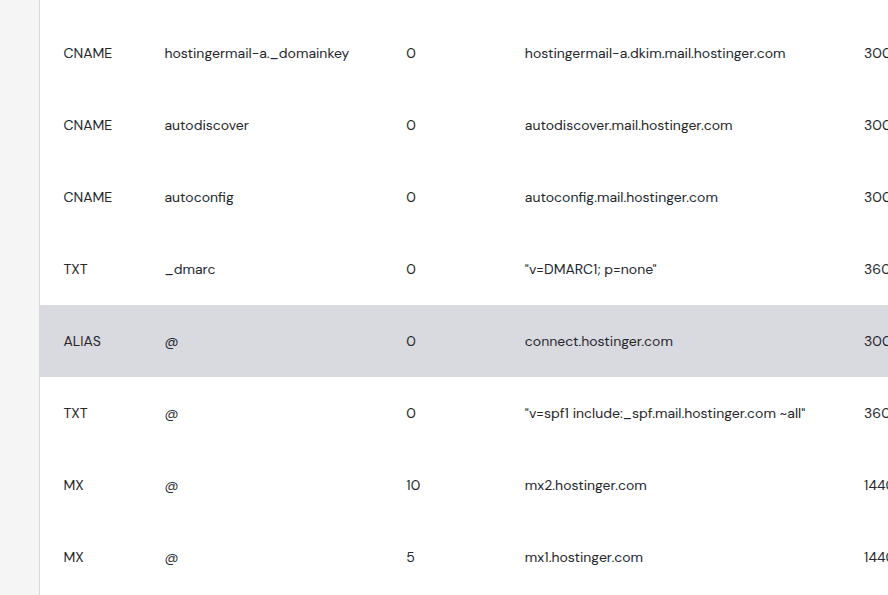
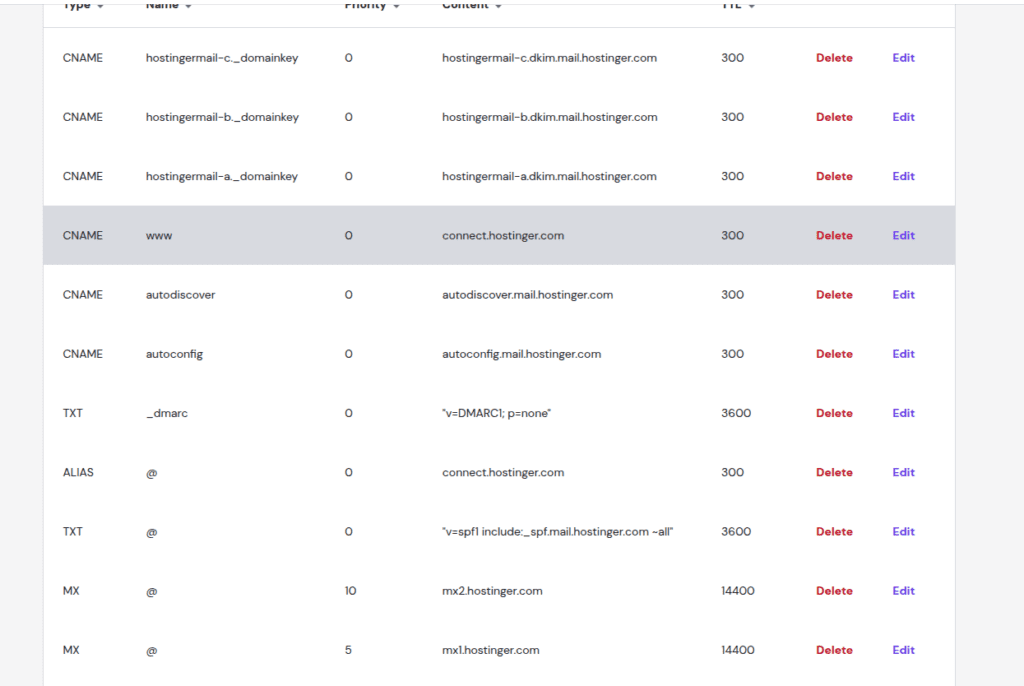
Check for existing CNAME records below the ones we need to find; these are provided by Hostinger by default.
Remove them one by one :
CNAME | www | connect.hostinger.com
ALIAS | @ | connect.hostinger.com
Frequently asked Questions
- How to know what my current DNS configs are?
I generally use the following DNS checker website. Below is the link.
https://dnschecker.org/all-dns-records-of-domain.php
Simply enter the domain name in the domain checker website, and it will show all DNS records, including A, MX, CNAME, and TXT records
This will help us verify where our domain actually points to Hostinger or Cloudflare
- What is TTL?
TTL stands for time to live
The shorter the TTL, the more frequently the DNS record is refreshed.
It is calculated in seconds.
TTL is kept mostly 4 hours as standard, and kept long also for stable sites.
- What is DNS?
DNS stands for Domain Name System. It is basically like a dictionary where the domain is mapped to the IP, and the data of the mapping is stored here.
Frequently HelpFul Troubleshoot tips
DNS Propagation may take from 5 min few hours
Clear your browser cache once before doing the check, or use incognito mode for doing checks for https
Check for ports in VPS if ports 80 and 443 are open.