Installing WordPress on a VPS with Docker Compose, Nginx Proxy Manager, and Let’s Encrypt
Installing package updates in Linux
First, update the existing package and upgrade
sudo apt update: this tells go and check if any existing packages have updates
&& if the first part work go and do the next part
sudo apt upgrade -y: This actually downloads and installs the updates,-y tells yes to every package

2.so lets start now with making the directory structure
mkdir -p ~/wordpress-app/nginx-conf

Cd to wordpress-app
Do ls and check the contents of the WordPress directory
We can see the specified directory has been created
Directory structure for WordPress app
~/wordpress-app/
├── .env # Secrets & Config
├── uploads.ini # PHP settings
├── docker-compose.yml # The Orchestrator
└── nginx-conf/
└── nginx.conf # Web Server Config
3.Now lets create the
.env file for storing the secrets and configs
Location wordpress-app/.env
nano .env
Add the following Details inside the file
Note: make sure to change the DOMAIN_NAME and DB_PASSWORD values
# --- Project Settings ---

PROJECT_NAME=wordpress

DOMAIN_NAME=<replace with your domain>(example.com)

# --- Database Secrets ---

# CHANGE THESE FOR PRODUCTION!

DB_ROOT_PASSWORD=your_password_here

DB_NAME=test

DB_USER=test_user

DB_PASSWORD=your_db_password_here

# --- WordPress Settings ---

WP_TABLE_PREFIX=wp_
Note:
Do ls -la to see the .env file in the list
Also, for security reasons,I have changed the values
Never upload your .env file to Github or share it.
Now create uploads.ini
Location:~/wordpress-app/uploads.ini
Content of file is below:
file_uploads = On
memory_limit = 256M
upload_max_filesize = 64M
post_max_size = 64M
max_execution_time = 600
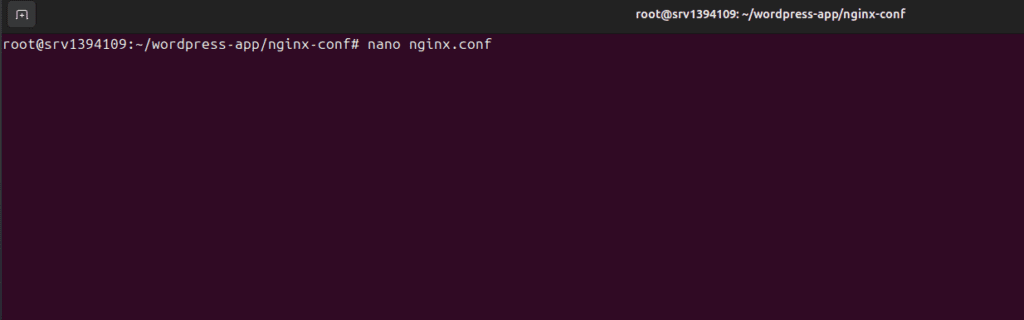
After this, make the changes in nginx.conf
Location: ~/wordpress-app/nginx-conf/nginx.conf
Command run:
nano nginx.conf
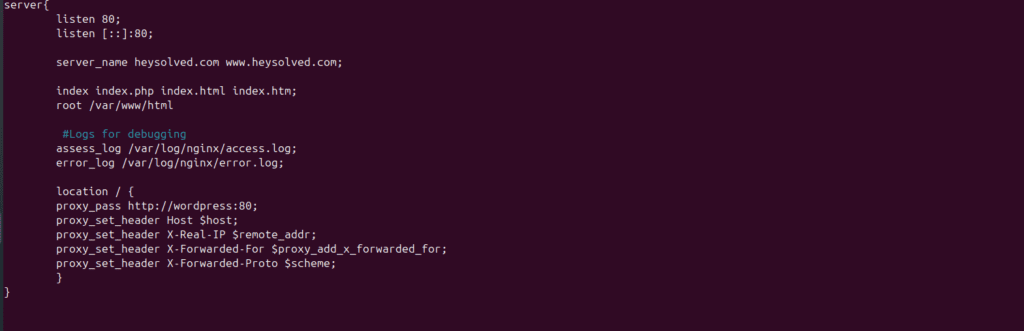
Contents:
listen 80 tells Nginx to accept ipv4 connections on port 80
We need this as IPv4 still carries vast amount of internet traffic
listen [;;]:80; tells Nginx to listen ipv6 connections on port 80
A user on IPV6 will have difficulty reaching the website and can get unreachane or can have delays
server_name example.com www.example.com;
It tells that if the request comes with these names, then we will serve it
In location block
This line is a bridge to connect the public nginx to the private WordPress container
proxy_pass http://wordpress:80;
Proxy_set_header Host $host;
This line tells what the host should be instead of docker container service name wodpress
proxy_set_header X-Real-IP $remote_addr;
With this Nginx will know the exact traffic is from outside the network, not insidethe same network
And what the actual ip
proxy_set_header X-Forwarded-For $proxy_add_x_forwarded_for;
X-Forwarded -For contain the full chain of IP
user-cloudflare-Nginx IP
ex-userIP,cloudflareIP
proxy_set_header X-Forwarded-Proto $scheme;
It tells whether user is visiting http or https
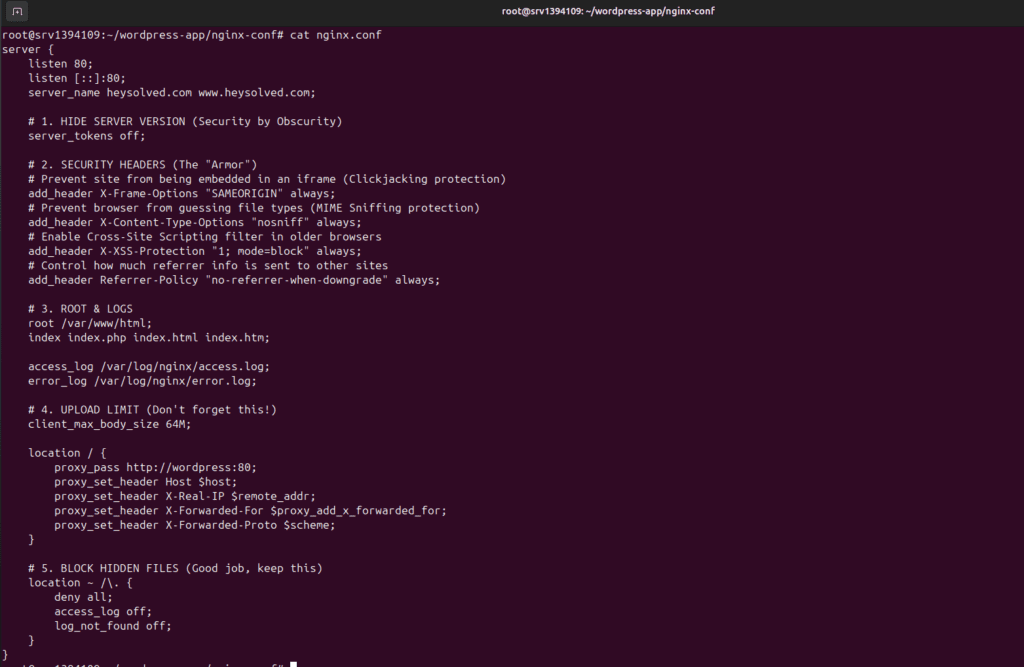
High security version of nginx.conf
Note change example.com with your domain
server {

    listen 80;

    listen [::]:80;

    server_name example.com www.example.com;

    # 1. HIDE SERVER VERSION (Security by Obscurity)

    server_tokens off;

    # 2. SECURITY HEADERS (The "Armor")

    # Prevent site from being embedded in an iframe (Clickjacking protection)

    add_header X-Frame-Options "SAMEORIGIN" always;

    # Prevent browser from guessing file types (MIME Sniffing protection)

    add_header X-Content-Type-Options "nosniff" always;

    # Enable Cross-Site Scripting filter in older browsers

    add_header X-XSS-Protection "1; mode=block" always;

    # Control how much referrer info is sent to other sites

    add_header Referrer-Policy "no-referrer-when-downgrade" always;

    # 3. ROOT & LOGS

    root /var/www/html;

    index index.php index.html index.htm;

    access_log /var/log/nginx/access.log;

    error_log /var/log/nginx/error.log;

    # 4. UPLOAD LIMIT (Don't forget this!)

    client_max_body_size 64M;

    location / {

        proxy_pass http://wordpress:80;

        proxy_set_header Host $host;

        proxy_set_header X-Real-IP $remote_addr;

        proxy_set_header X-Forwarded-For $proxy_add_x_forwarded_for;

        proxy_set_header X-Forwarded-Proto $scheme;

    }

    # 5. BLOCK HIDDEN FILES (Good job, keep this)

    location ~ /\. {

        deny all;

        access_log off;

        log_not_found off;

    }

}
Simpler version
After setting up nginx.conf,Note we will do the https setup later
Now lets write Docker Compose file
docker-compose.yml
Location: ~/wordpress-app/docker-compose.yml
Note indentation is important in yaml file.
version: '3.8'

services:

  db:

    image: mariadb:10.6

    container_name: ${PROJECT_NAME}_db

    restart: always

    command: >

      --innodb-buffer-pool-size=256M

      --max-connections=50

      --innodb-log-buffer-size=8M

    deploy:

      resources:

        limits:

          memory: 1024M

          cpus: '1.0'

        reservations:

          memory: 256M

    environment:

      MYSQL_ROOT_PASSWORD: ${DB_ROOT_PASSWORD}

      MYSQL_DATABASE: ${DB_NAME}

      MYSQL_USER: ${DB_USER}

      MYSQL_PASSWORD: ${DB_PASSWORD}

    volumes:

      - db_data:/var/lib/mysql

    networks:

      - wp-network

    logging:

      driver: "json-file"

      options:

        max-size: "10m"

        max-file: "3"

  wordpress:

    depends_on:

      - db

    image: wordpress:latest

    container_name: ${PROJECT_NAME}_app

    restart: always

    deploy:

      resources:

        limits:

          memory: 512M

    environment:

      WORDPRESS_DB_HOST: db:3306

      WORDPRESS_DB_USER: ${DB_USER}

      WORDPRESS_DB_PASSWORD: ${DB_PASSWORD}

      WORDPRESS_DB_NAME: ${DB_NAME}

      WORDPRESS_TABLE_PREFIX: ${WP_TABLE_PREFIX}

    volumes:

      - wp_data:/var/www/html

      - ./uploads.ini:/usr/local/etc/php/conf.d/uploads.ini

    networks:

      - wp-network

    logging:

      driver: "json-file"

      options:

        max-size: "10m"

        max-file: "3"

  nginx:

    depends_on:

      - wordpress

    image: nginx:alpine

    container_name: ${PROJECT_NAME}_nginx

    restart: always

    ports:

      - 80:80

    deploy:

      resources:

        limits:

          memory: 128M

    volumes:

      - ./nginx-conf/nginx.conf:/etc/nginx/conf.d/default.conf

    networks:

      - wp-network

    logging:

      driver: "json-file"

      options:

        max-size: "10m"

        max-file: "3"

  phpmyadmin:

    depends_on:

      - db

    image: phpmyadmin/phpmyadmin

    container_name: ${PROJECT_NAME}_pma

    restart: always

    ports:

      - 8080:80

    deploy:

      resources:

        limits:

          memory: 256M

    environment:

      PMA_HOST: db

      MYSQL_ROOT_PASSWORD: ${DB_ROOT_PASSWORD}

      UPLOAD_LIMIT: 64M

    networks:

      - wp-network

volumes:

  db_data:

  wp_data:

networks:

  wp-network:

    driver: bridge
Note the compose file is optimised to
Removing any existing docker installed before on vps
sudo apt-get remove docker docker-engine docker.io containerd runc
# Update the package index and install prerequisites
sudo apt-get update
sudo apt-get install ca-certificates curl gnupg
# Add Docker’s official GPG key sudo install -m 0755 -d /etc/apt/keyrings sudo curl -fsSL https://download.docker.com/linux/ubuntu/gpg -o /etc/apt/keyrings/docker.asc sudo chmod a+r /etc/apt/keyrings/docker.asc
# Add the repository to Apt sources echo \ “deb [arch=$(dpkg –print-architecture) signed-by=/etc/apt/keyrings/docker.asc] https://download.docker.com/linux/ubuntu \ $(. /etc/os-release && echo “$VERSION_CODENAME”) stable” | \ sudo tee /etc/apt/sources.list.d/docker.list > /dev/null
sudo apt-get update
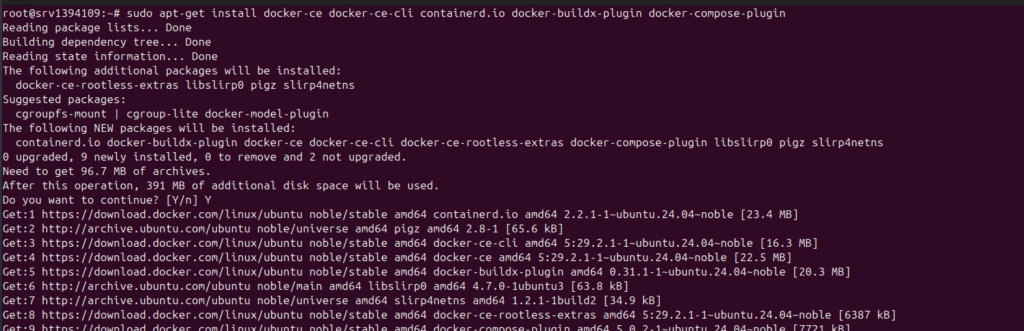
Install docker Engine and docker compose now
sudo apt-get install docker-ce docker-ce-cli containerd.io docker-buildx-plugin docker-compose-plugin
Can check if installed or not
Using docker –version

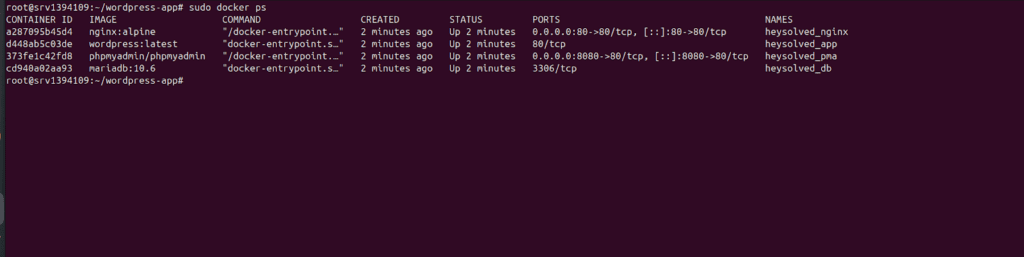
Check for existing containers running using
sudo docker ps

Now also check if docker compose installed using docker compose(written in Go)
Docker compose version

Run docker compose config
Location: /wordpress-app
This command help actually to verify the yaml file in this location we have just created.
Also its add the values from .env file and shows the final yaml file how docker sees it

sudo docker compose up -d –remove-orphans
Command breakdown
Up- command is to build,recreate ,start the containers defined in docker-compose.yml
File
-d detach mode
Containers will run in detach mode even if we close the session the the containers will be even running in the background. Otherwise if we close the session then
Container will also stop
–remove-orphans
This will remove any existing containers which are not mentioned in our yaml file
We can combine and run both also at once
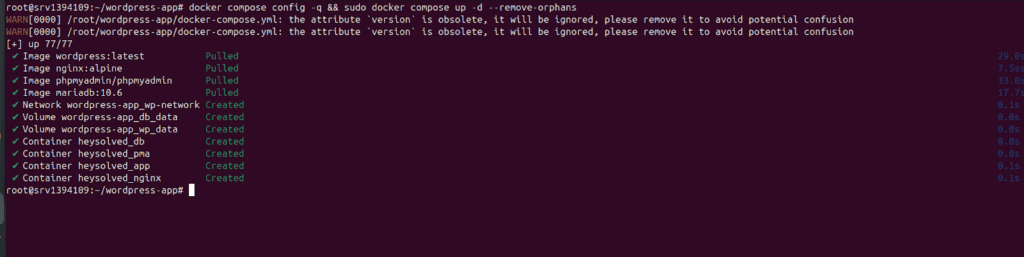
docker compose config -q && sudo docker compose up -d –remove-orphans
It will check if config is correct then only it will run second command.

Containers are created successfully
Containers are up and running
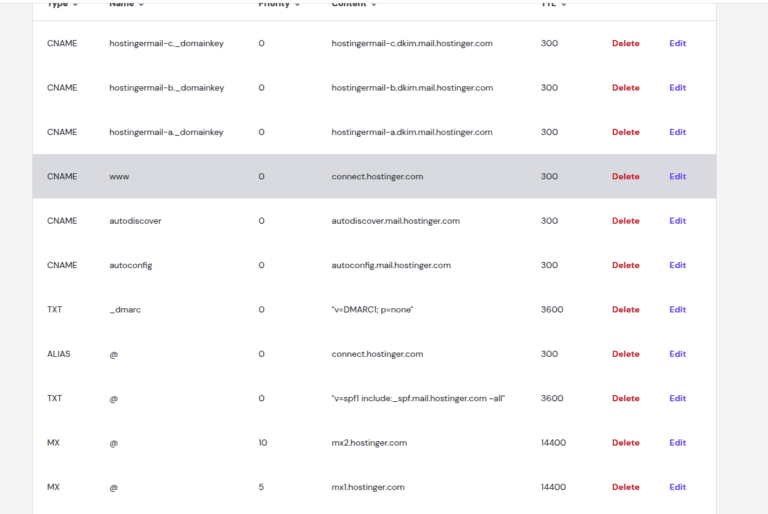
Setup domain add link here
Visit your website
http://example.com/wp-admin/install.php
http://www.example.com/wp-admin
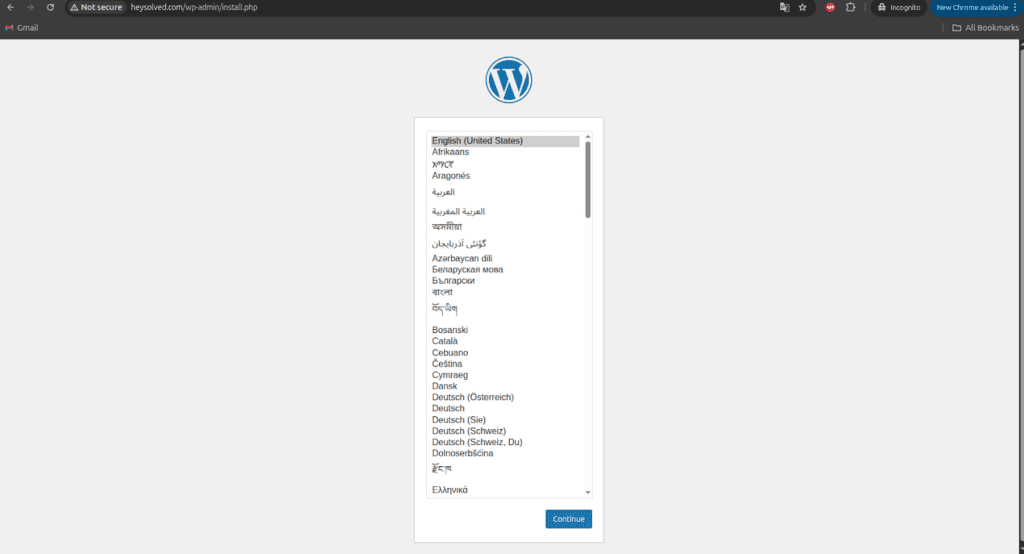
WordPress is ready to install now
Enjoy!!
For future changes in yml after that run
docker-compose up -d
“Note: Port 8080 is used for phpMyAdmin. For better security, you should close this port in your firewall or comment out the phpmyadmin service once your database setup is complete.”
Guide link :
Improving security for VPS files
Note for security, keep the YML file to 600

Using the below command, make root the owner of the docker-compose file
sudo chown root:root docker-compose.yml
We want only the root user to change this file
sudo chmod 600 docker-compose.yml
So later normal users will not be able to make changes in the file, as the root user has only the permission
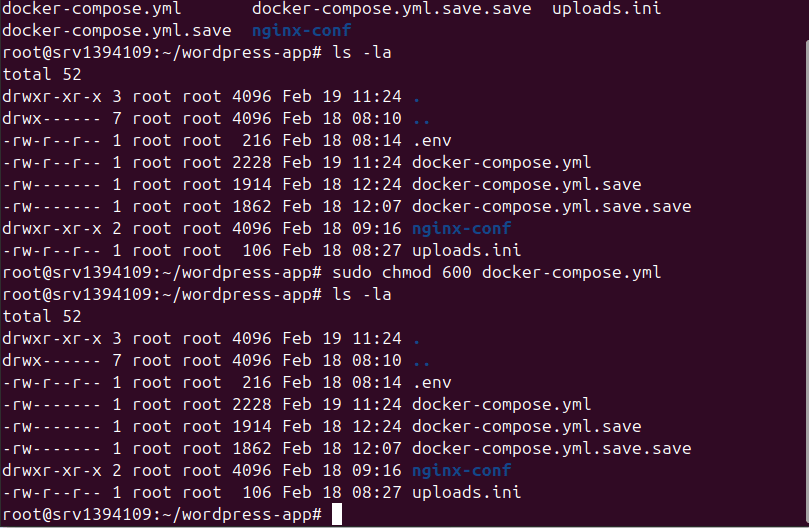
We have successfully given the permission so that only the root can read and write
-rw——- 1 root root 2228 Feb 19 11:24 docker-compose.yml
Owner= root
Group= root
Permission=600 (-rw——-)
– normal file
rw- Owner can:
Read
Write
Execute
— -> Group
No permission
— -> Others:
No permission
Also do it for .env file
SSH private keys(id_rsa)
Docker secrets
Config files with credentials